Have you ever called up your mechanic to let him know that something was wrong with your car, you didn’t know what it was, but it was making a noise? Then you had to, to the best of your ability, make the noise on the phone.
Most of us rely on three things to let us know there’s something wrong with our vehicle, a strange noise, leaks or an indicator light on our dashboard. But those things only let us know that something is wrong, but not what is wrong. These indicators also don’t let us know how to fix the problem.
A car diagnostic tool can help with that. While it won’t specifically tells you the exact problem or how to fix it, it will provide you with a code or codes that will give you a place to start when diagnosing a problem with your vehicle. Read on to learn how to use one yourself.
On-Board Diagnostic System (OBD)
Your car already has a system in place to monitor your car, which includes letting you know when something is wrong. It’s called the check engine light.
This can let you know that there is a possibility of something being wrong with the engine, exhaust or transmission. However, it could also mean a problem with the sensor itself or the wiring. It’s hard to know. But an OBD can be much more specific.
The OBD monitors the following:
- How your vehicle is driven
- Records information
- Analyzes this information
- Reports feedback
- Alerts you to an issue by providing a code or codes
At that time you can know if it’s an issue you can fix yourself, or if it’s time for a trip to the mechanic.
An OBD-I is for vehicles made prior to 1996. When purchasing an OBD-I, you much get one that is specific to your car’s year, make and model.
An OBD-II is for all cars made after 1996. An OBD-II uses standardized codes for any vehicle, regardless of year, make or model. Some manufacturers may have specific codes that do go beyond the basics, but often that’s unnecessary for most vehicles.
Where to Get a Car Diagnostic Tool
Car diagnostic tools or scanners are much easier to come by and far less expensive than they used to be. You can purchase one from a local auto parts store or from an online store. Some stores rent them out, but that can be cost-prohibitive.
For nearly the same price, you can own one and be proactive when it comes to troubleshooting potential car problems. Click here for a great online retailer.
How to Connect It
Once you’ve purchased a diagnostics scanner, figuring out where to plug it in can sometimes be confusing. If you have an OBD-I, then the location varies. The size and shape of the plug on your scanner will dictate where to connect it.
With an OBD-II, the usual place to connect it is under the dashboard and to the left of the steering wheel column. Sometimes it’s hard to find or is covered by a panel.
Occasionally, the OBD-II connector is behind the ashtray or in another unusual place. The owner’s manual can help you out if you’re having a difficult time finding the connector.
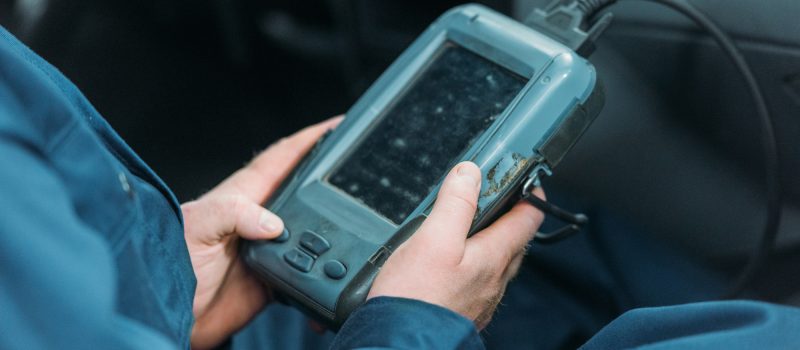
Using the Code Reader
Once you locate the connect, insert the plug. It should slide in easily. If not, it’s probably upside-down.
Once the diagnostic tool is connected, you can then turn the ignition key to the on position. You will then be prompted to input the VIN and type of engine your car has.
Finally, you will be provided with codes on the dash. A basic code reader will give you stored codes. Other scanners can give you the option to read the trouble codes or see other information.
Interpreting the Codes
Make note of any trouble codes, and then do your research, usually online.
As mentioned, the codes are universal, if you have an OBD-II, so a code P0115 means that there’s an engine coolant temperature circuit malfunction. It doesn’t tell you the exact problem or cause, but now you know where to start.
There are some pricer and more advanced scanning tools that will tell you what the code means in more precise terms and even give you some troubleshooting options.
What’s the Next Step?
Check the scanner manual or website to see if there are some suggestions for troubleshooting.
You can also go online and one-by-one rule out possible causes. There are online forums that can often give you good answers.
Sometimes this involves trial and error. Good thing many parts stores offer great return policies.
If you’re still having problems, or it’s a problem bigger than you can fix, it’s still helpful to know ahead of time what to expect if you need to take your vehicle to a professional mechanic.
Other Benefits of a Car Diagnostic Tool
A vehicle scanner helps to evaluate your car and lets you know what might be wrong with it by indicating codes. But there are other benefits it offers.
For instance, once a car has been repaired, it can clear out stored trouble codes. This is an important step to take, because if the code pops up again, you know it’s a new problem and not just the old problem coming up again.
The tool is also helpful to indicate if you’ve actually fixed the problem. If it’s still there, there’s a good chance your repairs are not complete.
It can also help demonstrate overall performance readiness and many include GPS to track your car if it’s ever lost or stolen.
Final Thoughts
Car diagnostic tools are super useful for troubleshooting, keeping your car well maintained and for knowing right away if there’s a problem.
Staying on top of your car’s repairs can help prevent more expensive repairs in the future. It also helps prevent embarrassing phone calls to the mechanic or having an untrustworthy mechanic suggest unnecessary repairs.
As a responsible car owner, it’s a great tool to own.
For information on how to find a great mechanic in your area and other small business professionals, click here.