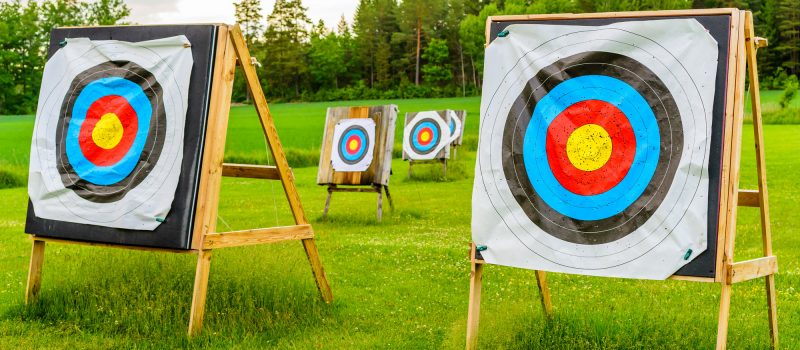
Let’s face it, not everybody is ready to shell out $50 or more for a steel target stand.
Between the firearms, ammo, and time on the range, training with your gun can get pricey fast. While there’s nothing wrong with the standard commercial target stands, some gun owners prefer to use their budget for firearm equipment rather than a target stand.
Why break the bank over something that you’re going to blow to bits anyways over the course of a few months?
One way to cut down costs is to build a DIY target stand–one that does the same job for only a fraction of the cost. With low-cost materials that you can get from a local hardware store, you can make a target stand that’s strong, lightweight, and easy to repair.
So how can you get the durability of a professionally made target stand with the cost and effort of a DIY design? Let’s break it down.
How to Make a DIY Target Stand for Shooting
There’s no shortage of target stand designs and options out there–but the cost is enough to make any gun owner think twice.
Turning to DIY will let you create your own portable target stand at a fraction of the cost. All you need is a little bit of cash and some hard work.
Here’s how you can do it.
1) What You’ll Need
Depending on the price at your local hardware store, the cost for the parts may range anywhere from $20 to $40. Here are some of the parts you’ll need:
- 1.5″ PVC pipe, 10′
- 1.5″ PVC pipe, 2′
- 1.5″ PVC tee joint (x 4)
- 1.5″ PVC 90? elbow (x 2)
- 1.5″ PVC cap (x 2)
- 1.5″ PVC test cap (x 4)
- 1″x2″x8′ furring strips
- PVC cement
- dirt/gravel/sand
Most of the tools you’ll need you might have lying around the house or garage already. But if you don’t, they should be relatively cheap. Here’s what you should look for:
- Measuring tape or yardstick
- Marker
- Hand Trowel
- Hacksaw (or PVC pipe cutter)
- Spray paint (optional)
2) Cutting the Material
If you don’t have a hacksaw or PVC pipe cutter, some hardware stores like Home Depot will cut the PVC for you. This makes bringing the long pieces of pipe home much easier.
Take the 10 and 2 ft sections of PVC pipe and mark off 16″ lengths with a marker. Then cut the pipe using your hacksaw.
You should have eight pieces of PVC pipe, each 16″ long. You can discard any pieces that are left.
3) Sealing the PVC
Now it’s time to make use of your PVC test caps and PVC cement.
Keep in mind–PVC cement is a chemical which can be dangerous if not properly ventilated. Be sure to wear gloves, do your work outside in an open space, and lay newspapers or something similar underneath to avoid any staining.
Also be sure to read the label on your PVC cement and follow instructions carefully.
Take four of the 16″ PVC pipes you just cut and seal one end of each pipe with PVC cement and the test caps.
4) Assembling the Legs
For the next step, you’ll be putting together the PVC pipe which will make up the rear base legs of your target stand.
Take two of the PVC pipes that you just sealed with the test caps and cement. Fill each of these pipe sections with something heavy. This can be gravel, pebbles, or just sand from your backyard.
Once the material is inside the pipe, seal the other end with PVC caps and cement. Make sure that it’s completely sealed and nothing can leak out either end.
5) Assembling the Front Base
Now, take the other two PVC pipes that have test caps and fill them with the gravel, pebbles, or sand.
On the end without the test caps, cement a 90? elbow to each pipe.
Then, take one of the unsealed 16″ pieces of pipe and cement it to the open end of one of the elbows. Fill it with the heavy material, and then seal the other end of the pipe to the other elbow.
Your base should now look like three sides of a square.
6) Completing the Base
Take the two tee joints and cement them to each end of the base. You’ll want the main outlet of the tee joint to be pointing upwards.
Then cement two more PVC pipes into the open ports of the tee joint that are parallel with the front base. These will act as rear legs for the base to support your DIY target stand.
7) Assembling the Upright Section
After completing the bottom of your target stand, it’s time to start the upright section.
In the main outlet of each tee joint, cement an unused piece of PVC pipe. These pieces of pipe should be pointing upwards while your base rests on the ground.
Then, take the remaining PVC pipe and cement both ends into the main outlet of the two remaining tee joints.
Finally, slide the tee joints onto base section of your target stand. If you’re going to use it at this location permanently, feel free to cement it on. If you want a portable target stand, it’s best to leave it unglued so you can disassemble it later.
8) Finishing up
Now that your target stand is complete, all that’s left is to put in the actual target.
With the remaining open outlet of each tee joint, insert a furring strip. Make sure that they’re a snug fit and use a mallet or something heavy to tap them in place.
Depending on how tall you want your target stand, you can cut the furring strip accordingly.
If you want to change the color of the PVC pipe, you can spray paint your target stand any color you want. Make sure you use a paint that’s designed both for plastics and to withstand outdoor weather.
Finally, attach a target or other cardboard backing directly to the furring strip.
9) Using the Stand
Once you’ve finished your DIY target stand and attached the target itself, it’s important that you know how to use it.
Unless you have a shot that goes far off target, you probably won’t run the risk of harming any of the PVC target pieces. A stray bullet might hit the furring strips, however, and your cardboard target will definitely take some damage.
Replace the furring strips in the case of any damage and swap out your target regularly to keep your target stand intact.
And of course, it’s always important to have a firearm capable of hitting the stand from a distance without sacrificing accuracy. If you’re looking for a new upper or you need an upgrade, check out Native Arms for their firearm selection.
Final Thoughts
Why throw away money for an expensive target stand when you can make one at home?
Making a DIY target stand is cheap, low effort, and produces a high-quality and easy to carry target stand for all of your shooting needs. This is just one method of putting together PVC pipes–there are even more options out there to create a sturdy yet lightweight design.
Looking for more tips and tricks? Check out our website for more consumer resources.